
Manage requirements
A requirement states what the system shall do, never how, and it has to be verifiable by someone who did not write it: a test engineer must be able to tell, without asking you anything, whether the system meets it.
What a good requirement looks like
The seven rules under Key concepts apply to a requirement as they do to every item. On top of them, a requirement has a shape of its own: four parts, in this order.
Put together, that gives one sentence with all four parts present and in order.
| Part | In this example |
|---|---|
| Condition | When a new patient transport request is received, |
| Subject | the patient aid system shall |
| Action and object | store the patient identifier, incident location, and time of call |
| Constraint of the action | within five seconds of receiving the request. |
Leave out the constraint and there is nothing to test. Leave out the condition and the requirement applies unconditionally, which is usually wider than intended.
| Field | What goes in it |
|---|---|
| Summary | A brief subject-and-verb statement of the capability. Do not repeat the Type or Category, they already have their own fields. |
| Description | The full requirement statement, in the four-part shape above, using "shall". One sentence per behaviour. A complex requirement can carry a diagram, a state table, or an interface description as well. |
| Type | The engineering domain that owns the requirement, such as System, Software, Hardware, or Mechanical. A System requirement is written at the system boundary; a Software requirement may name software items and interfaces. Mandatory on an approved requirement. |
| Category | One or more classifications, such as Functional, Performance, Safety, or Risk Control. Drives the traceability and risk coverage reports. Mandatory on an approved requirement. |
| Justification | Why the measurable bound was chosen: a standard, a clinical rationale, an operational analysis, or a risk assessment result. Not a repeat of the acceptance criteria. |
| Acceptance criteria | The measurable threshold or observable outcome a test engineer can write a test from, without asking you anything. |
| Source | The stakeholder need or risk control this requirement derives from. Every requirement must have one. |
| Assignee | The person creating the requirement, or the person reviewing and approving it. |
| Mitigated risk | The risks this requirement mitigates. |
| Derived requirements | The lower-level requirements this one breaks down into, when it is a system-level requirement. |
| Linked specifications | The specifications that implement this requirement. |
| Test method | How the requirement is tested: inspection, test, analysis, review, or demonstration. |
| Linked test | The test that verifies this requirement. |
| Verification evidence | The verification document from Document Control, where the evidence is a document rather than a test. |
| Product | The product this requirement applies to. |
| Part | The part this requirement applies to. |
| Software system | The software system this requirement applies to. |
| Software item / unit | The software item or unit this requirement applies to. |
| Field | Good | Poor |
|---|---|---|
| Summary | Store transport records within 5 seconds of receipt | Fast storage |
| Description | When a new patient transport request is received, the patient aid system shall store the patient identifier, incident location, and time of call within five seconds of receiving the request. | The PostgreSQL database shall quickly store patient data and also send a confirmation to the UI. |
| Type | Software | (empty) |
| Category | Functional, Performance | (empty) |
| Justification | The five-second limit comes from an operational analysis: dispatch decisions are made within ten seconds of request receipt. | Required by stakeholder. |
| Acceptance criteria | Under peak load (50 or more concurrent requests), all records are stored and retrievable within 5 seconds in 99.9% of cases. | The data is stored. |
Write "shall" whatever the Priority is, and change the Priority field instead of softening the wording. Write one behaviour per requirement, so split anything joined by "and" into two. Keep component names, technology choices, and implementation detail out of the Description, since those belong in a specification. Make the acceptance criteria measurable, since "within an acceptable time" and "correctly" do not count. The Justification says why the bound was chosen and the Acceptance criteria say what the bound is, so neither can be a copy of the other. Type and Category must both be set before a requirement can be approved.
The statuses a requirement moves through
Find the requirements you are missing
No single pass catches every requirement a stakeholder need implies, so expect to work through the list more than once.
- Work top down from each approved stakeholder need. Derive one or more requirements from it, checking every category against each one. Most categories will not apply to any given need, so several tend to spread across a handful of requirements rather than piling onto one.
- Work bottom up from the list of categories. Go category by category, looking for a requirement no stakeholder need produced. Where you find one, work out which stakeholder needs relate to it and record the traceability. Where none matches, raise a new stakeholder need rather than leave the requirement without a source.
- Repeat the bottom-up pass once a system architecture exists. Building the architecture usually revises some of the requirements already written, and it typically generates new ones besides.
- Create sub-system requirements once the architecture identifies the sub-systems, using the Derived Requirements field on the parent requirement. The first level uses the System type. The sub-system levels below it use whichever type actually fits: Software, Hardware, Mechanical, and so on.
Every risk control is a requirement. Give it the category Risk Control, either as a new requirement or by adding the category and the risk link to a requirement that already exists.
Create a requirement
- Open the Jira space and select the Design Control tab.
- On the space page, select the Requirements tab, then click + New Requirement.
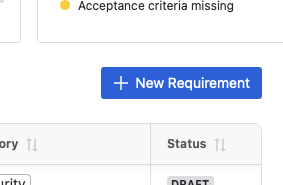
The New Requirement button above the requirements table, next to a warning card flagging missing acceptance criteria. - Fill in Summary, Description, Type, and Category in the create dialog, then click Create.
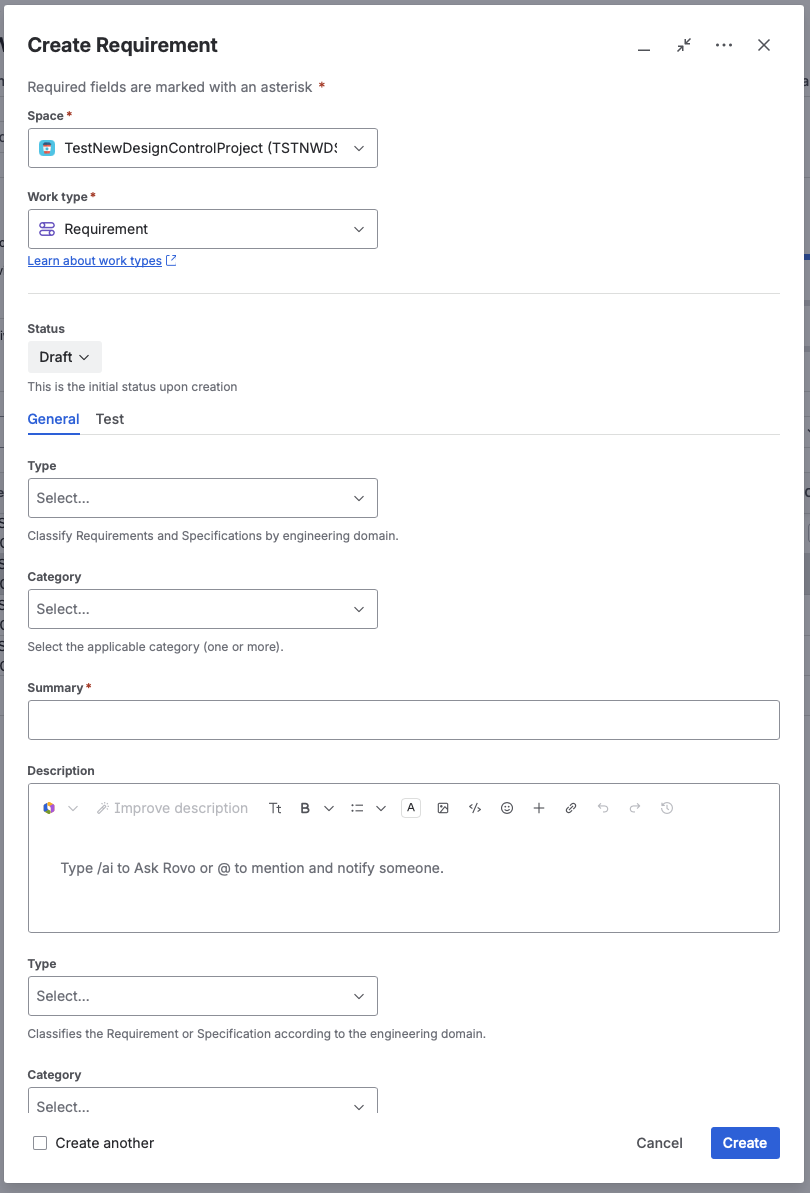
The Create Requirement dialog, with the work type set to Requirement and fields for Type, Category, Summary, and Description. - Open the new work item and complete the rest of the fields and tabs with whatever information is already available.
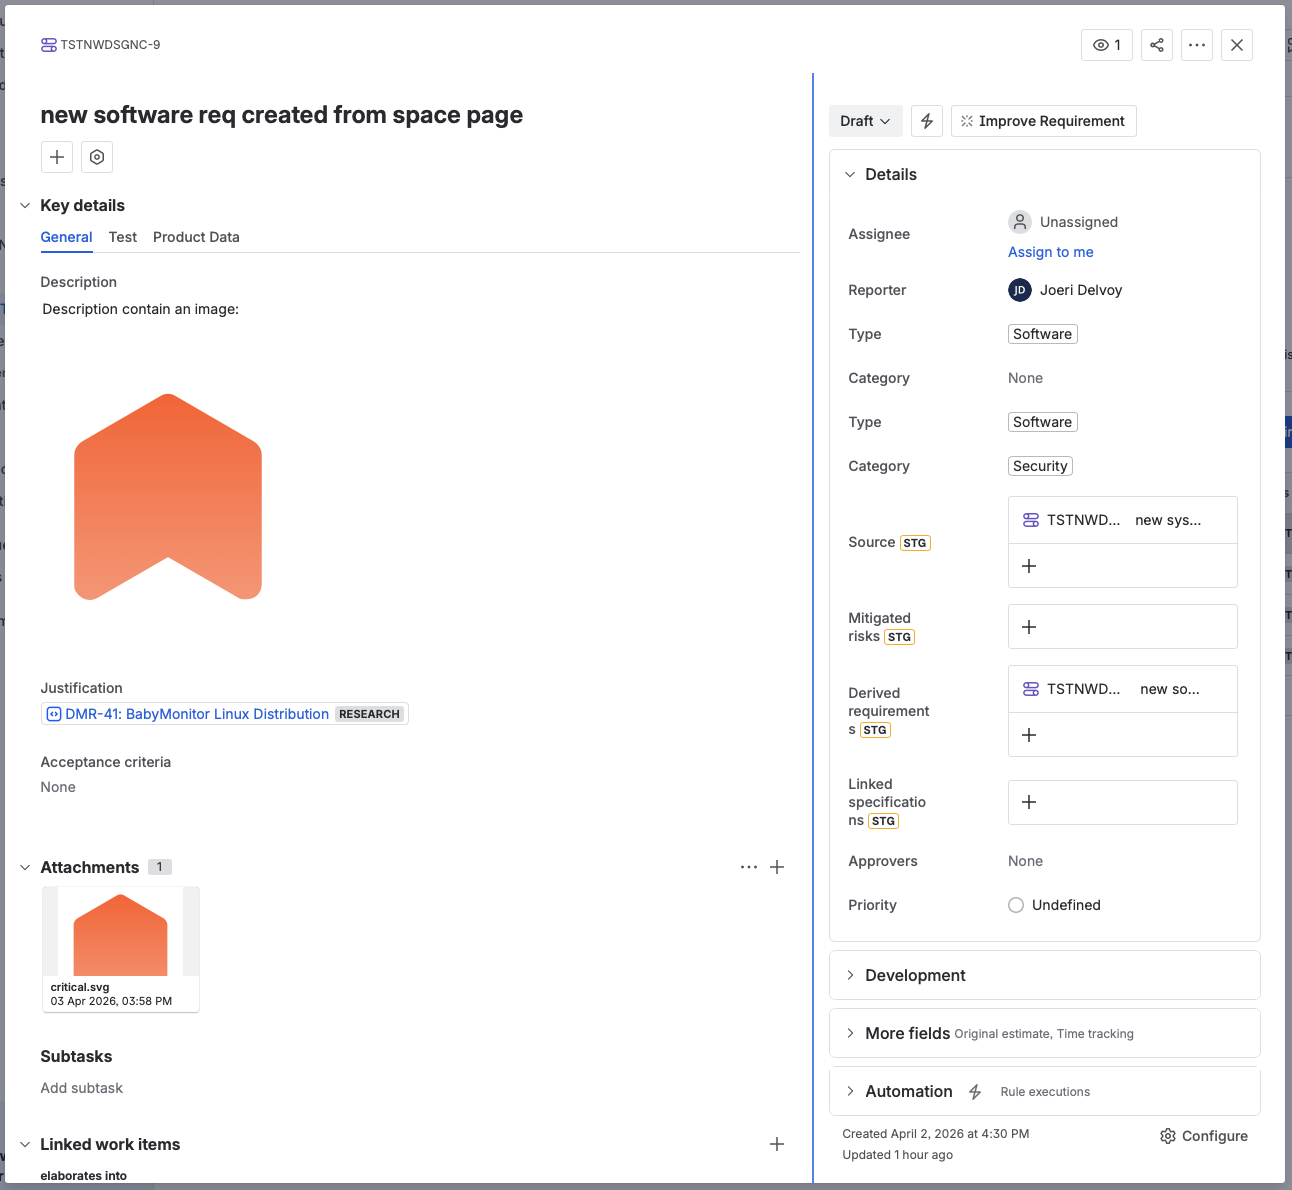
The opened requirement, with its Key details tabs on the left and the Details panel, including Type, Category, Source, and Derived Requirements, on the right.
Review and approve a requirement
- Expand the row’s details panel (click the arrow on the left) to check what is already filled in, or click the key to open and edit the work item.
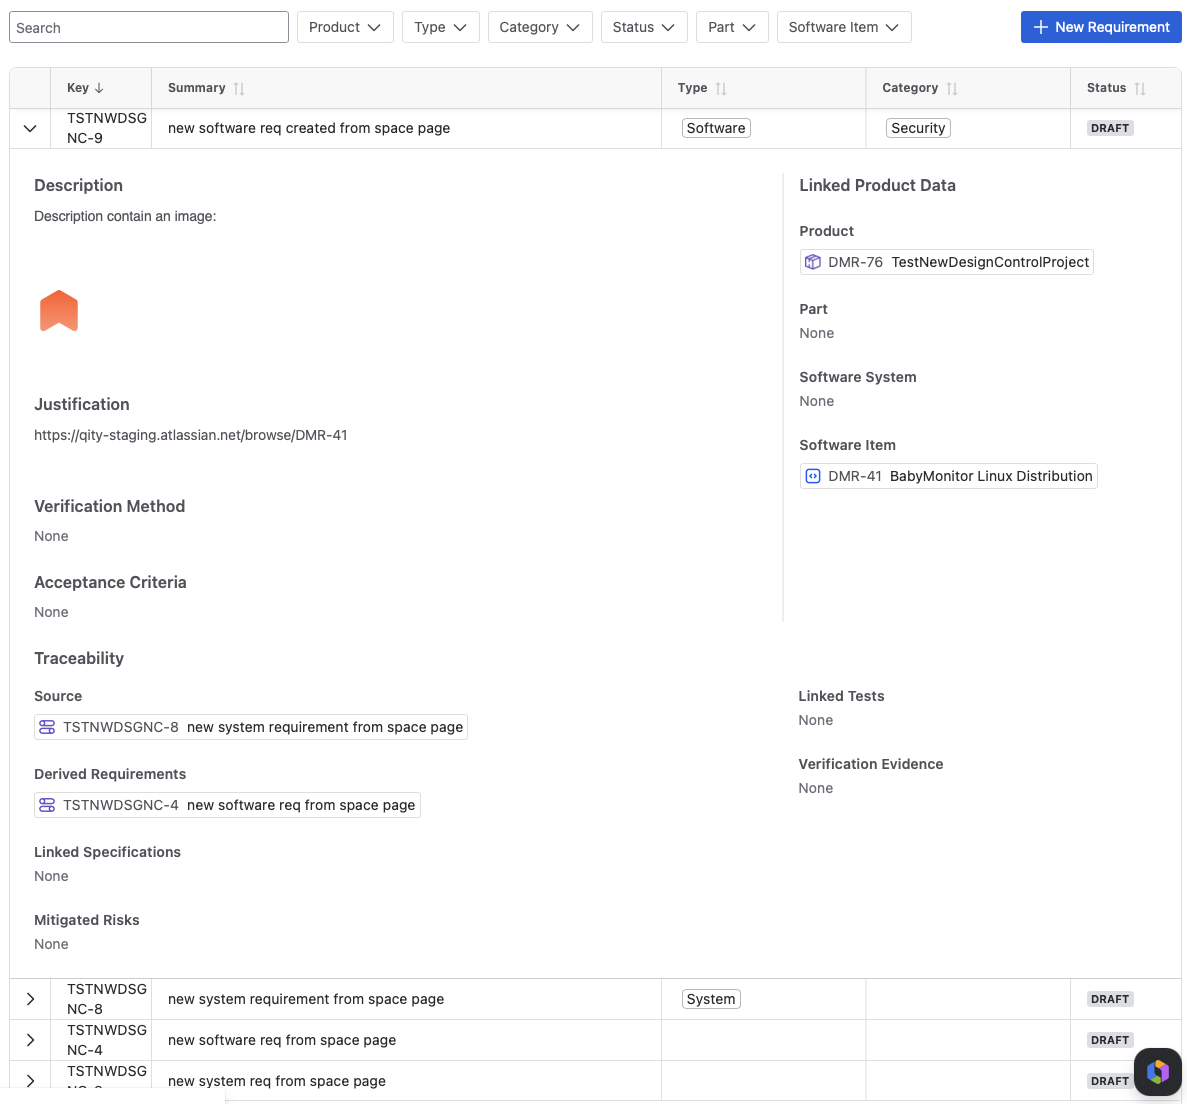
The requirements table with its filter bar, and one row expanded into the details panel, showing Description, Linked Product Data, Verification Method, Acceptance Criteria, and the full Traceability group: Source, Derived Requirements, Linked Specifications, Mitigated Risks, Linked Tests, and Verification Evidence. - If the requirement does not contain all its content, fill in at minimum Summary, Description, Justification, Acceptance Criteria, Type, Category, and Source, plus the product data: Product, Part, and Software System and Software Item where they apply.
- Set the Assignee to the reviewer, then move the status to In review.
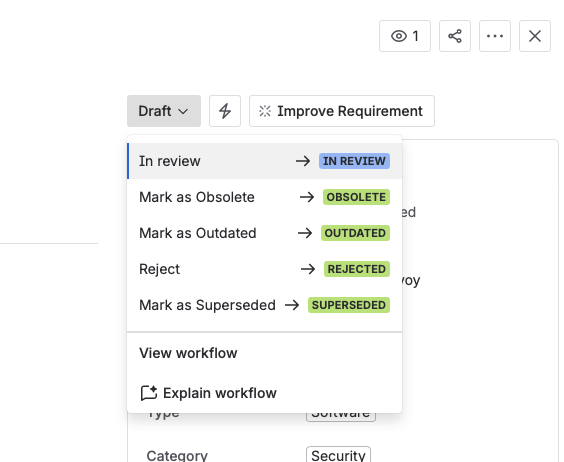
The status menu opened from Draft, offering In review alongside Mark as Obsolete, Mark as Outdated, Reject, and Mark as Superseded. - As the reviewer, choose Approve or Reject, adding a comment where it helps.Where your configuration requires a signed approval, Qity emails a passcode, and the status only moves once you enter it in the Signature dialog.
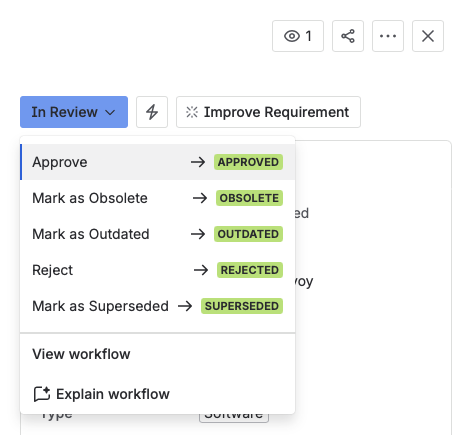
The status menu opened from In review, with Approve at the top of the list, above Mark as Obsolete, Mark as Outdated, Reject, and Mark as Superseded.
Mark a requirement as covered
- Check the requirement is linked to its parent stakeholder need.
- Check it has at least one linked specification.
- Check it has a linked test or verification evidence.
- Move the status to Covered.
All three links have to be in place before a requirement can be covered: the parent stakeholder need, a specification, and a test or verification evidence. Miss one and the requirement stays open, whatever else is filled in.
Update an approved requirement
- Open the requirement and move its status from Approved or Covered to Outdated.
- Assign it to whoever is going to make the update.
- Revise the content, then move the status back to In review and take it through approval again.
Retire or replace a requirement
- To retire a requirement outright, open it and move the status to Obsolete.
- To replace one instead, open the ... menu on the old requirement and choose Clone.
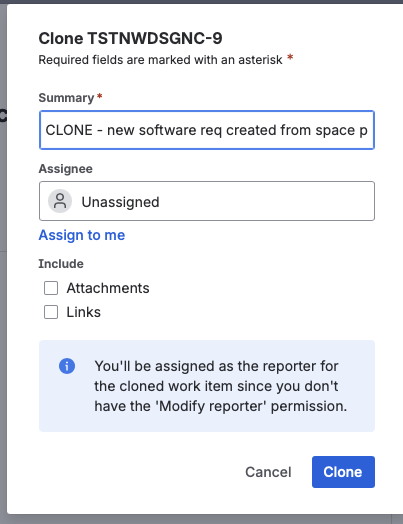
The Clone dialog, with the Summary pre-filled as "CLONE - " plus the original title, and Include checkboxes for Attachments and Links. - Check Include: Links, and remove the
CLONE -prefix from the Summary. - Move the old requirement’s status to Superseded, then take the new one through review.
Export requirements to a controlled document
- In Confluence, create a new document in the Draft Documents space from the Requirements template. See Create a document or template for the creation wizard.
- Open the document and go to the Requirements macro. Set Products and any Type or Category filters, or leave them empty to import everything, then choose the Fields to include.
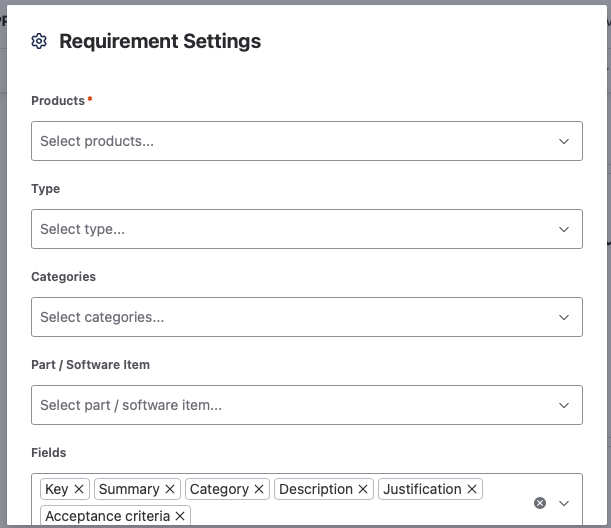
The Requirements macro settings, with Products required, optional Type, Categories, and Part / Software Item filters, and the Fields to include, such as Key, Summary, Category, Description, Justification, and Acceptance criteria. - Click Save to pull the content from Jira. If the macro is not on the page yet, insert it by typing
/requirements.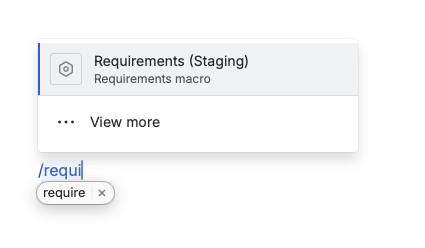
The slash command menu, with the Requirements macro suggested after typing "/requi". - To change what was imported, click the macro in edit mode and reopen its settings.
Fill in the rest of the document, then take it through approval in Document Control.