
Analyze and score a safety risk
A safety risk is the assessment itself: this hazard, reached by this sequence of events, causing this harm, at this probability. This guide covers the first half of the work, from creating the risk to giving it a score before any control is applied. Control a safety risk picks up from there.
Before you start
The analysis needs the hazard list and the harm list to exist, because a risk selects from both and takes its severity from the harm. If either is incomplete, finish Manage hazards and Manage harms first.
Create a safety risk
- Open the space and go to the Safety Risk page.
- Open the Risks view and launch the Safety Risk table.The panels above the table summarize the register: how the risks split by category, heat maps of initial and residual risk across probability and severity, and a Warnings card counting what is incomplete, such as risks with no linked risk control, no hazard or harm, or no scoring justification. It is the quickest way to see what still needs work.
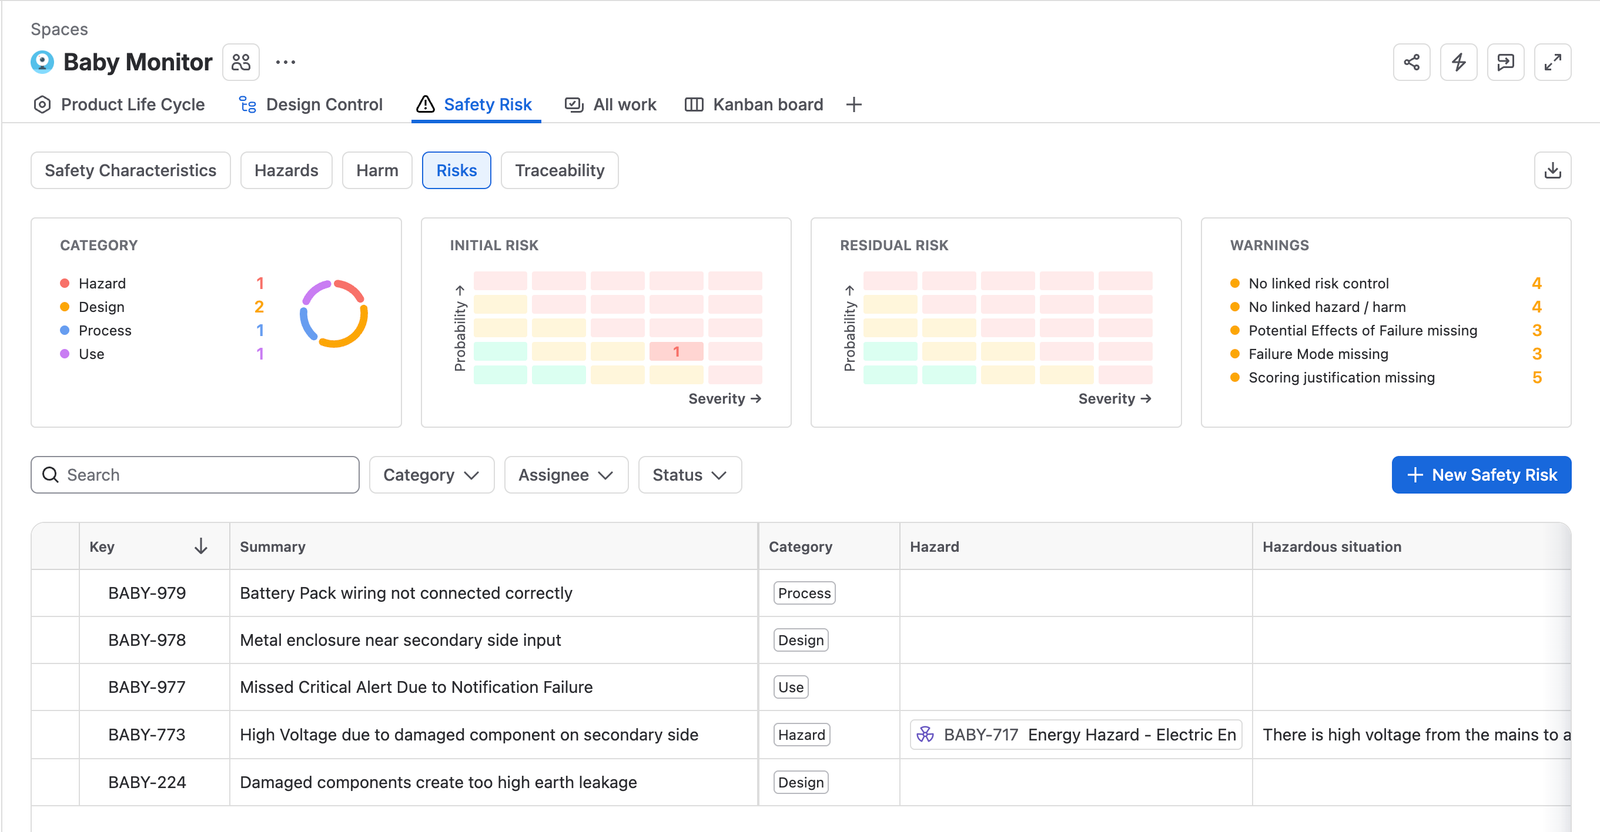
The Risks tab, with a category donut, initial and residual risk heat maps, and a Warnings card counting missing risk controls, hazards, harms, failure modes, and scoring justifications above the risk table. - Click + New Safety Risk, then give the risk a Description and set its Category.The category is the method you are running: Hazard for a hazard analysis, Design for a DFMEA, Process for a PFMEA, Use for a URRA. Key concepts explains what each one examines.
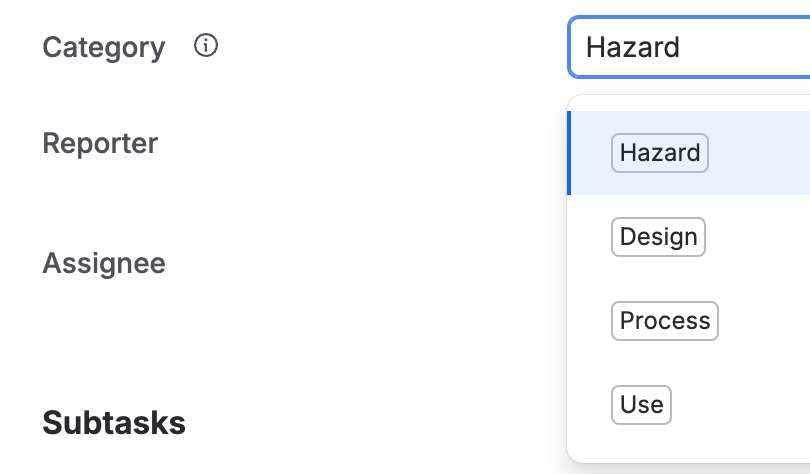
The Category field open on a safety risk, offering Hazard, Design, Process, and Use. - Set the Assignee so it is clear who is carrying this risk. Not mandatory, and it saves a conversation later.
- Move the risk to Analysis.
Changing the category partway through re-checks the item against the fields the new category needs, and can send it back for reassessment if any of them are empty. Set the category deliberately at the start rather than correcting it later.
Analyze a hazard risk
Run this analysis when the category is Hazard. It works forward from a hazard to the harm it can cause.
- Identify the Hazard or hazards this risk assesses, from the hazard list.
- Say whether this is a multi-fault risk. Only some products need a multi-fault assessment, and the standards that apply to your product say which.
- Write the Sequence of events that could lead to a hazardous situation, then describe the Hazardous situation itself.
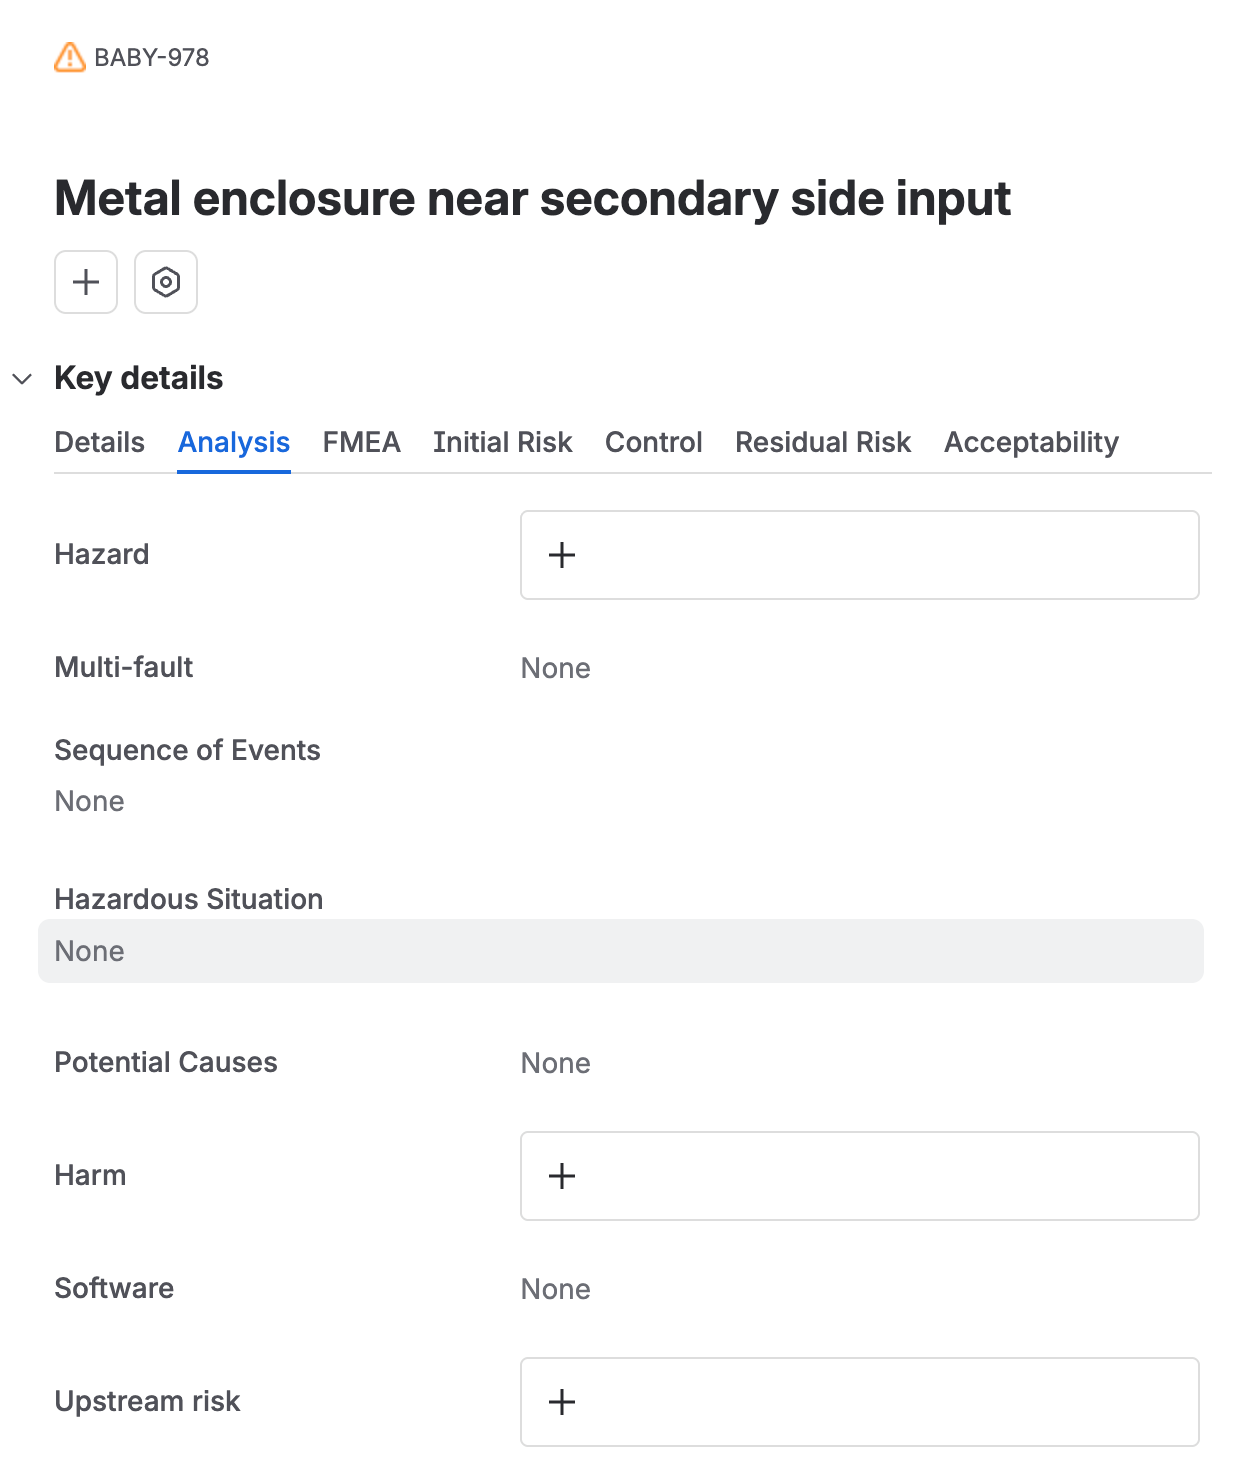
The Analysis tab of a safety risk, with Hazard, Multi-fault, Sequence of Events, Hazardous Situation, Potential Causes, Harm, Software, and Upstream risk. - Choose the Potential causes that could set that sequence in motion. This is a multi-select from a fixed list, covering material, mechanical, dimensional, electrical, software, process, contamination, procedural, equipment, and measurement causes, the three classes of use error (perception, cognition, action), foreseeable misuse, servicing error, and environmental factors.A fixed list rather than free text, so causes stay comparable across the register and a later DFMEA can be filtered against them.
- Select the Harm the hazardous situation could cause. The severity comes with it.
- Say whether software could trigger or cause this risk.
- Move the risk to Evaluation, using the transition that matches its category.
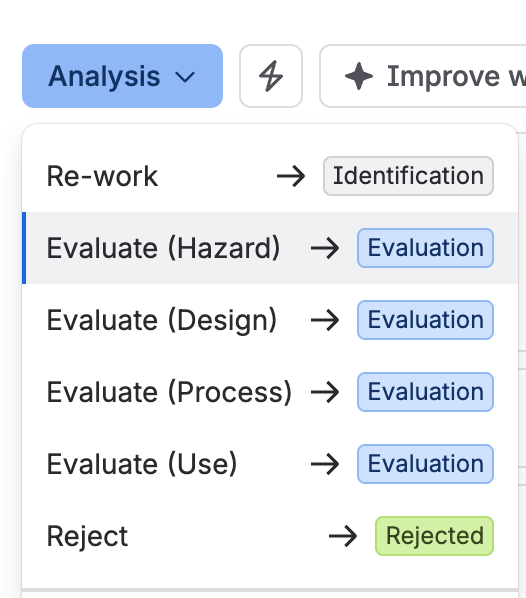
The status dropdown on a risk in Analysis, offering Re-work back to Identification, one Evaluate transition per category, and Reject.
One hazard often produces several risks. Where a different cause, a different sequence of events, or a different hazardous situation needs assessing, clone the risk rather than widening one item to cover both.
Analyze a design risk
Run this analysis when the category is Design, for a design FMEA. It works backward from a failure in a part.
- Describe the Failure mode for a part in the product. Each failure mode is its own safety risk.
- Identify the Part the failure mode affects.
- Describe the Potential effects of failure that could follow from that failure mode.
- Link the hazard risk the failure mode contributes to. Not mandatory, and worth doing: it is what shows that a design weakness connects to a hazard already assessed and mitigated earlier in the design process.
- Move the risk to Evaluation.
Analyze a process risk
Run this analysis when the category is Process, for a process FMEA. It works backward from an error in a manufacturing or process step.
- Describe the Failure mode for a step in a work instruction. Each failure mode is its own safety risk.
- Identify the process document and step the failure mode affects.
- Describe the Potential effects of failure that could follow.
- Link the design risk the failure mode contributes to. Not mandatory, and it connects a process weakness to a design risk already assessed.
- Move the risk to Evaluation.
Analyze a use risk
Run this analysis when the category is Use, for a use-related risk assessment. It works backward from a use error.
- Describe the Failure mode for a step in a use scenario. Each failure mode is its own safety risk.
- Identify the Use scenario the failure mode affects.
- Describe the Potential effects of failure that could follow.
- Link the design risk the use error contributes to. Not mandatory, and it connects a use weakness to a design risk already assessed.
- Move the risk to Evaluation.
What each transition requires
The app checks the fields its category needs at every status change, and tells you which are still empty rather than moving the item. Leaving Analysis needs a different set for each category.
| Leaving Analysis as | Required fields |
|---|---|
| Hazard risk | Category set to Hazard, Software, Hazard, Harm |
| Design risk | Category set to Design, Software, Sequence of events, Hazardous situation, Potential causes, Hazard, Harm, Part |
| Process risk | Category set to Process, Software, Failure mode, Potential effects of failure, Hazard, Harm, Process document |
| Use risk | Category set to Use, Software, Failure mode, Potential effects of failure, Hazard, Harm, Use scenario |
Work the risks table
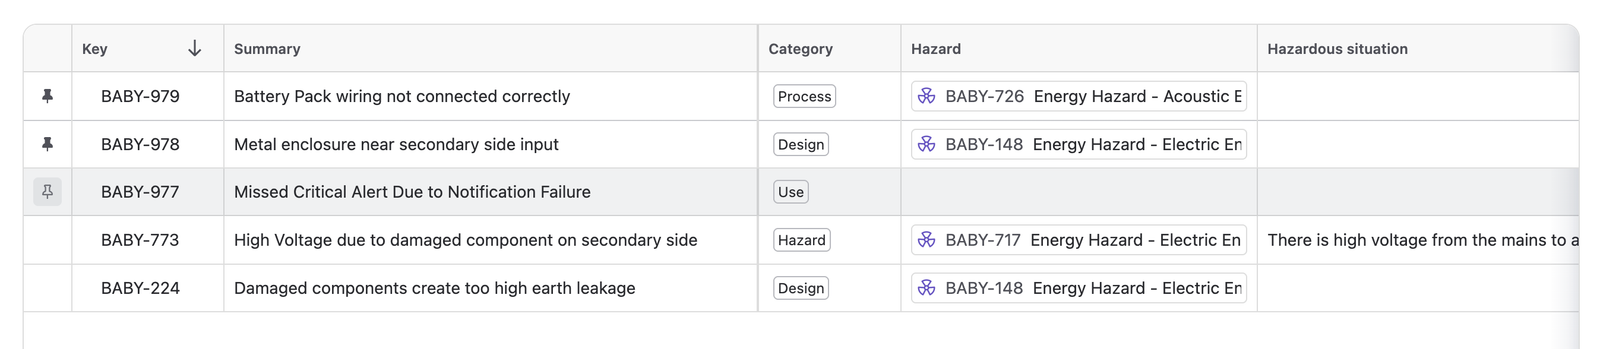
The risks table is wide. A single risk carries its category, its hazard and harm, the analysis fields its method needs, and then two full sets of scores, initial and residual. Two pinning features keep that readable, and they solve different halves of the problem.
Use both together when you are reviewing a whole register. A pinned reference row plus a pinned identifying column turns a table you have to keep re-orienting yourself in into one you can read straight across.
Score the initial risk
- Set the Initial P1, the probability of the hazardous situation occurring.
- Set the Initial P2, the probability of that hazardous situation going on to cause harm.
- Read the resulting risk level on the Initial Risk tab. The Severity is not yours to set: it comes from the harm you selected during the analysis, and the app combines P1 and P2 into an overall probability, then multiplies that by the severity.
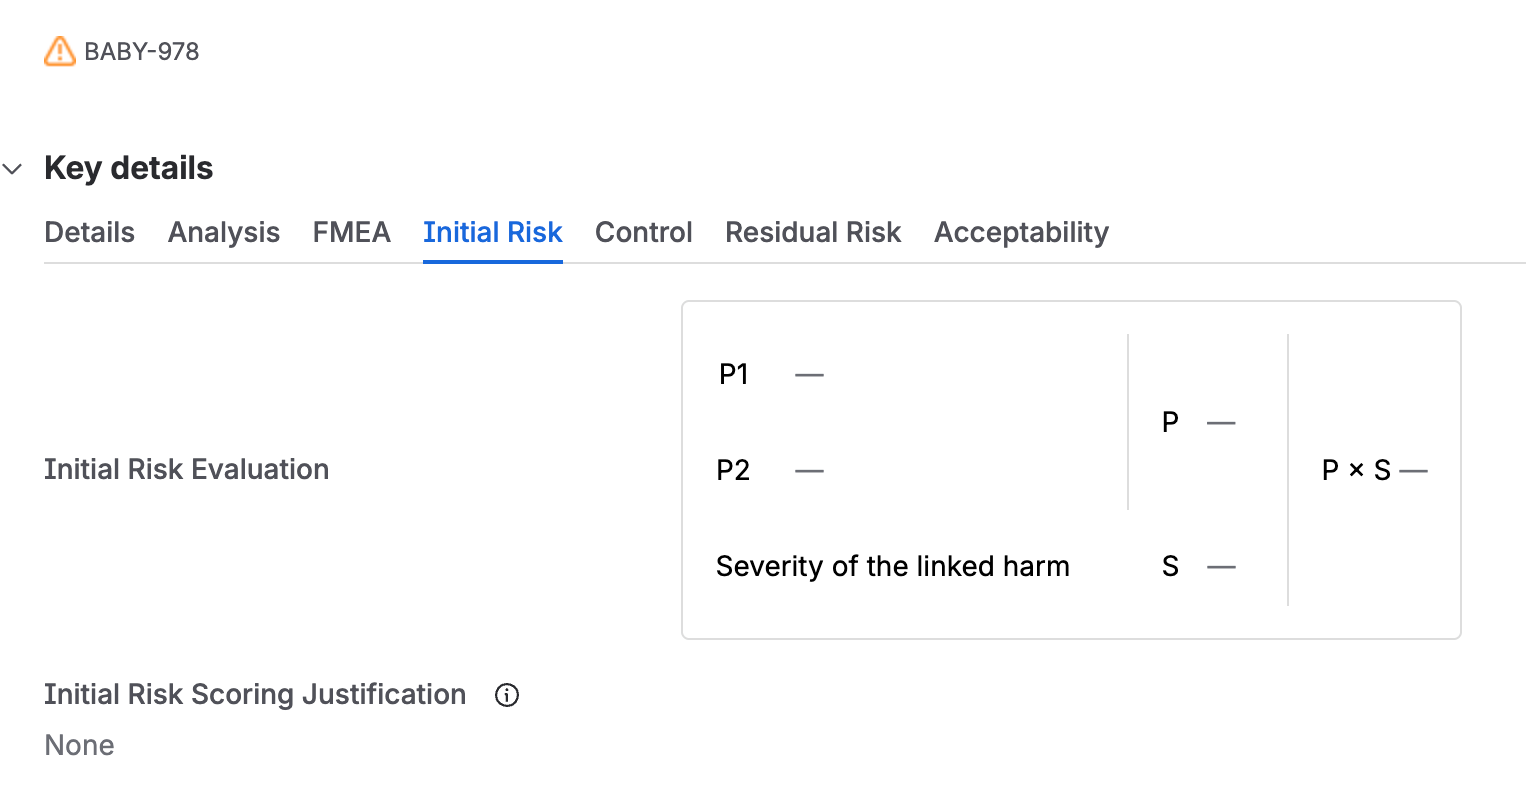
The Initial Risk tab, showing P1 and P2 combining into P, the severity of the linked harm as S, and the risk level as P times S, with the scoring justification below. - Write the Initial risk scoring justification, saying how you arrived at those two probabilities. This is the field a reviewer reads, so record the reasoning rather than the conclusion.
- Move the risk to Control.
| Leaving Evaluation | Required fields |
|---|---|
| Any category | Initial P1, Initial P2, Initial risk scoring justification |