
Manage specifications
A requirement says what the system shall do. A specification says how it will be built, precisely enough that an engineer can build it and a tester can verify it.
What a good specification looks like
The seven rules under Key concepts apply to a specification as they do to every item, including "shall" for anything mandatory. On top of them, a specification has one job the requirement above it does not: it has to add implementation-level detail. If everything in it could have been written on the requirement, it is not a specification yet.
| Field | What goes in it |
|---|---|
| Summary | The behaviour or component being specified. Do not restate the Type or Category here. |
| Description | A precise, unambiguous statement of how the system, part, or component will behave. It can name components, interfaces, APIs, data models, and protocols, and can include tables of inputs and outputs, error codes, or state diagrams. It has to add detail beyond what the linked requirement already states. |
| Type | The engineering domain. Should match or narrow the Type of the linked requirement. |
| Category | The classification, inherited or refined from the linked requirement. |
| Justification | Why this design approach satisfies the requirement: the trade-offs weighed, and any standard or technology chosen. |
| Acceptance criteria | The pass or fail condition for verification, specific, observable, and measurable. Must be at least as precise as the linked requirement’s acceptance criteria, and usually more so, since it becomes the basis for the verification test. |
| Source | The requirement this specification implements. Always required. |
| Assignee | Whoever creates the specification, or reviews and approves it, depending on the stage it is in. |
| Test method | How the specification will be verified: Inspection, Test, Analysis, Review of documents or records, or Demonstration. |
| Linked test | The test, or tests, that verify this specification. |
| Verification evidence | The evidence document from Document Control that proves the specification was verified. |
| Product | The product, or products, the specification applies to. |
| Part | The part the specification applies to. |
| Software system | The software system the specification applies to. |
| Software item / unit | The software item or unit the specification applies to. |
Here is what that looks like in practice, for the same underlying behaviour.
| Field | Good | Poor |
|---|---|---|
| Summary | Persist transport record to transport_events via the Records API | Save data |
| Source | Linked to the requirement to store transport records within 5 seconds of receipt | (empty) |
| Description | When the Records API receives a validated transport request payload, the TransportRecordService shall persist a row to transport_events, populating patient_id, incident_location (WGS84 coordinates), and received_at (UTC timestamp), and shall return HTTP 201 with the record UUID within 500 ms of the database commit. | The system shall save the transport record. |
| Type / Category | Software, Functional and Performance | (empty) |
| Justification | PostgreSQL with a write-optimised index on received_at was chosen over the existing audit log table, which cannot support the geospatial indexing the dispatch query needs. The 500 ms budget comes from the requirement’s 5-second limit, minus 4.5 s for network and validation. | Same as the requirement. |
| Acceptance criteria | Given a valid transport request, the Records API returns HTTP 201, and transport_events holds a row with the correct patient_id, incident_location, and received_at within 500 ms, under a load of 50 or more concurrent requests. | Data is saved correctly. |
Source must always point at a requirement. A specification without one is orphaned and cannot be traced. A specification that only restates its requirement is not a specification, since it adds nothing the requirement did not already say: name the components, interfaces, data types, tolerances, and protocols that make it buildable. Never copy a requirement’s acceptance criteria verbatim, and never weaken or contradict them, refine them for this implementation instead. Justify the design decisions, particularly a trade-off or a choice of technology or standard. Keep each specification to one implementation behaviour.
The statuses a specification moves through
The workflow runs one way through design, development, and testing, with two parking states for when something stalls and four states reachable from wherever the specification currently stands.
Create a specification
- Open the Design Control tab on your Jira space, then select the Specifications tab.
- Click + New Specification to open the creation wizard.
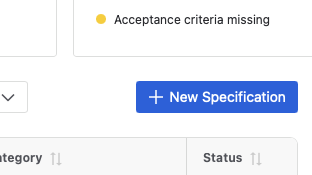
The + New Specification button above the Specifications table, next to a warning for missing acceptance criteria. - Fill in the Summary, Description, Type, and Category, then click Create.
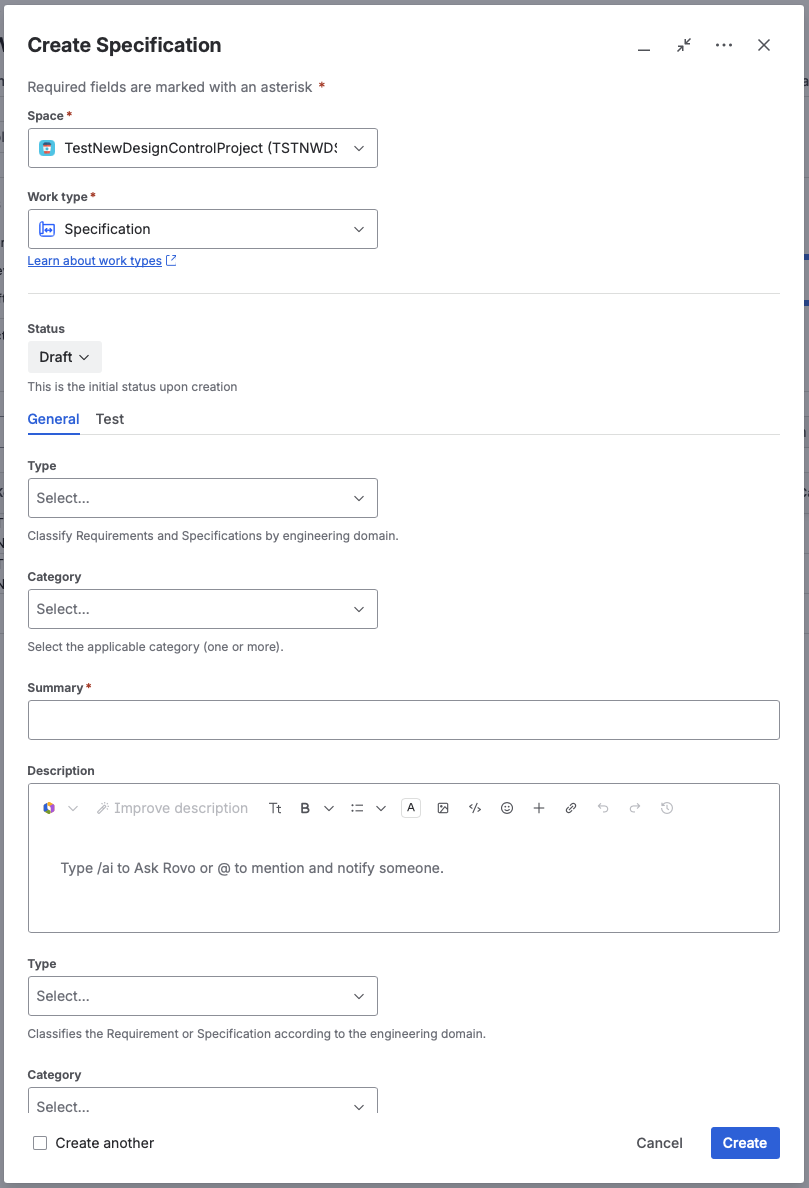
The Create Specification wizard, with fields for Summary, Description, Type, and Category alongside a Test tab. - Open the new specification and complete the rest of its fields, including the Source requirement it implements.
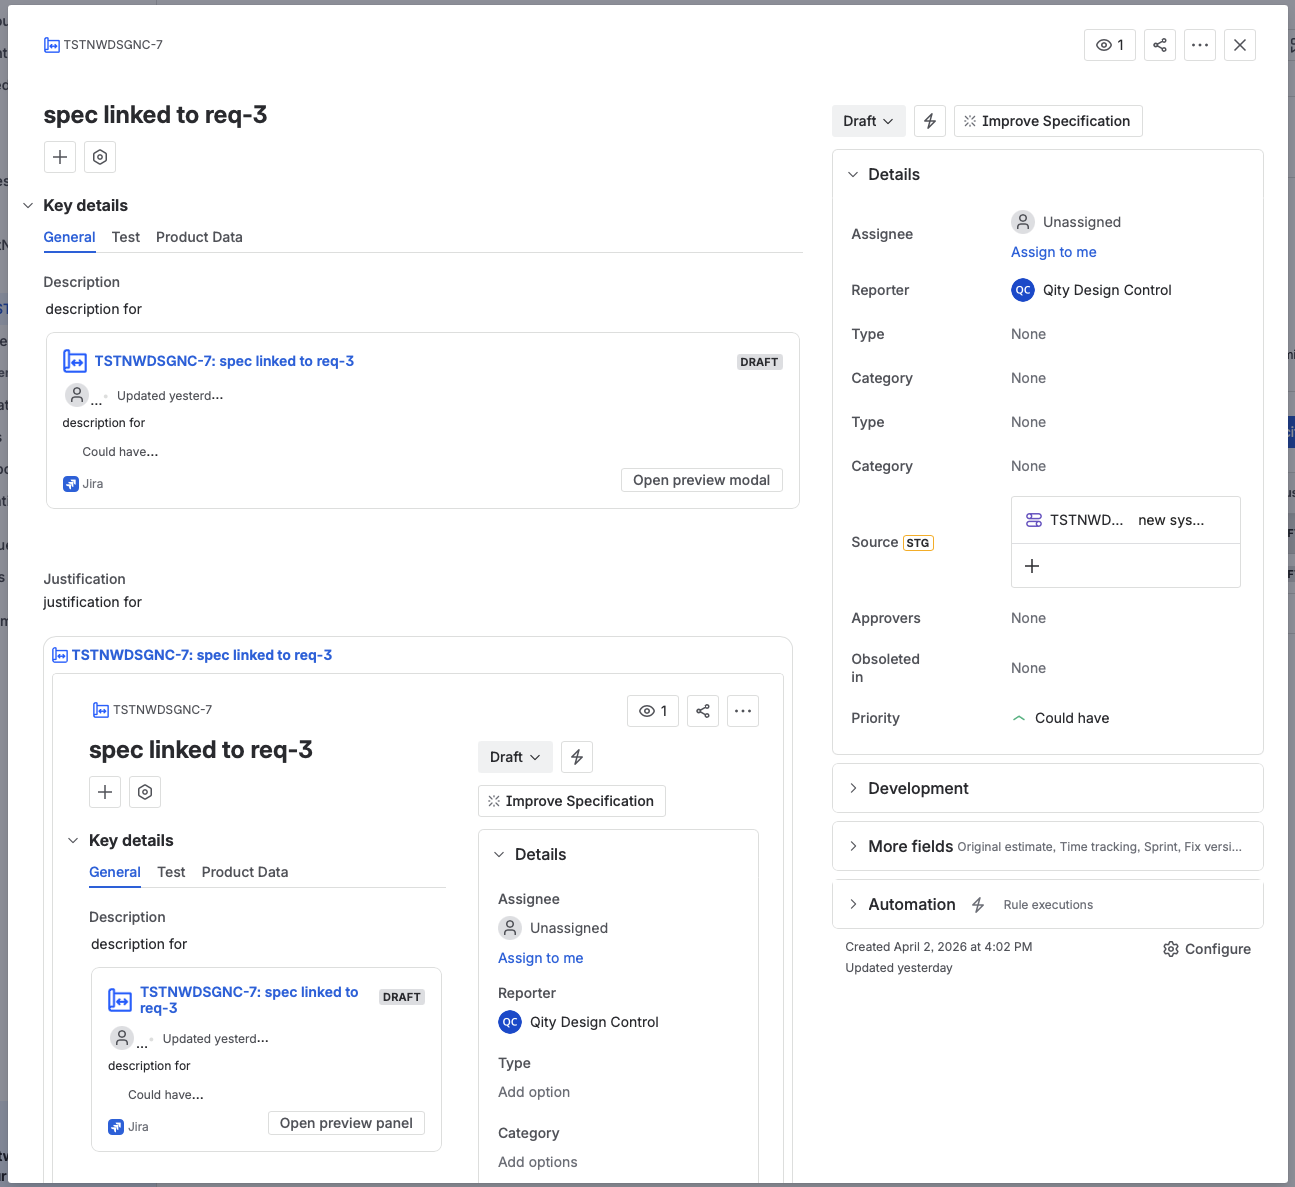
The specification work item, with its General, Test, and Product Data tabs under Key details, and the Details column holding Type, Category, Source, Approvers, Obsoleted in, and Priority.
Design a specification
- Open the Specifications table, expand a row’s details panel to see where it stands, or click the key to open the item itself.
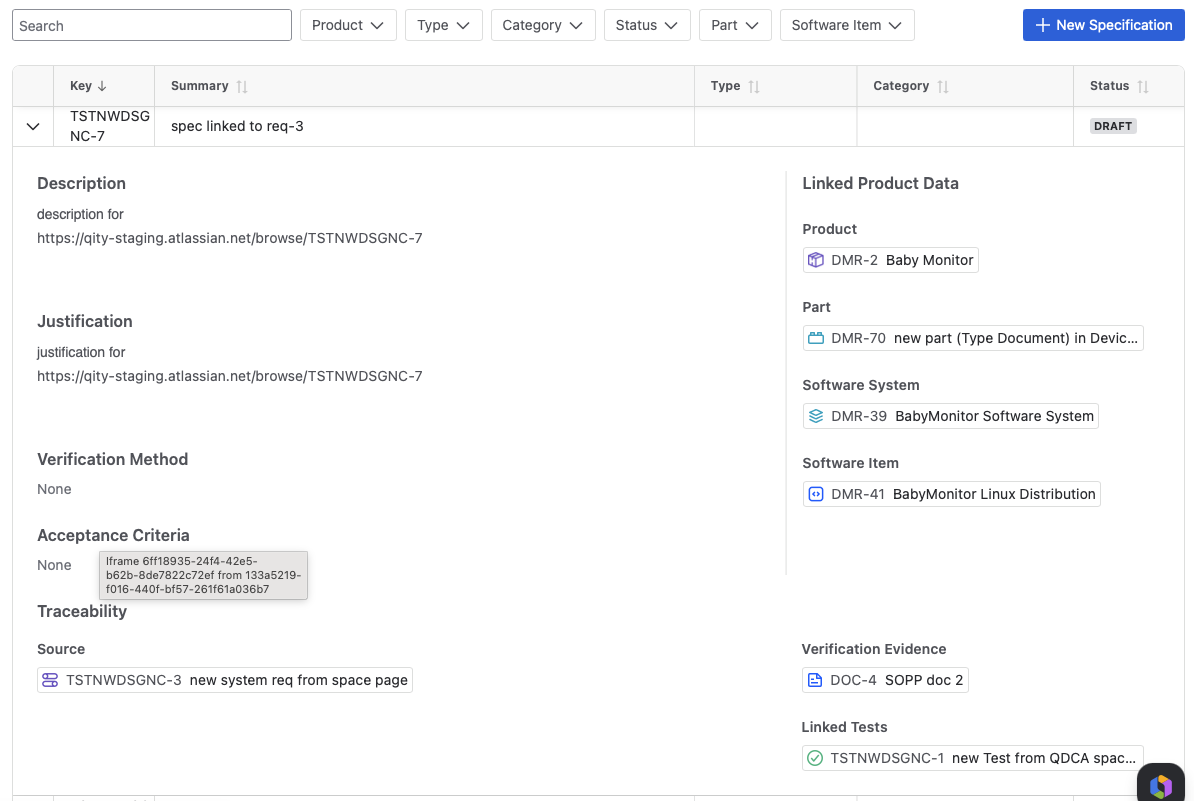
The Specifications table with its filter bar, and one row expanded into the details panel: Description, Justification, Verification Method, and Acceptance Criteria on the left, the Traceability links and Linked Product Data on the right. - Move the status to In design.
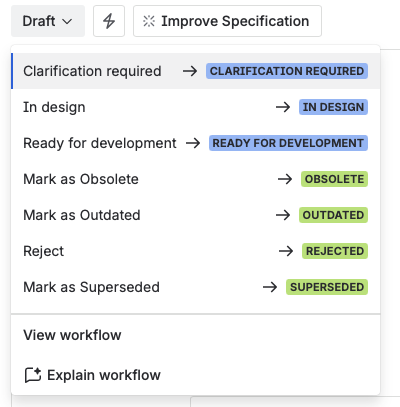
The status menu opened from Draft, with In design and Ready for development alongside Clarification required and the Outdated, Obsolete, Rejected, and Superseded transitions. - Fill in as much of the specification as you can, then move it to Design review with the Assignee set to whoever will review it.
- The reviewer moves it to Ready for development, or sends it back to design with Redesign required.
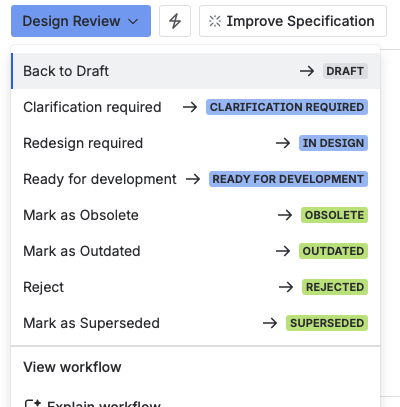
The status menu opened from Design review, offering Ready for development, Redesign required back to In design, Back to Draft, Clarification required, and the four terminal transitions. - If the linked requirement is not clear enough to review, the reviewer uses Clarification required instead, with the assignee set to whoever can answer.
Implement a specification
- Move the specification to In development.
- Start the implementation from the specification itself, using Create branch in the Development panel. Any repository with a Jira integration works the same way, and once it is connected, commits, pull requests, and builds all show up on the same panel.
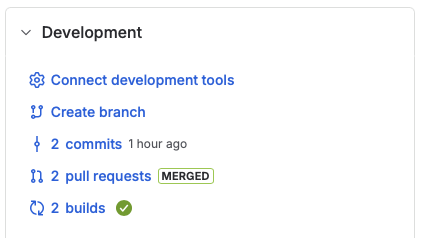
The Development panel on a specification, listing Create branch, two commits, two merged pull requests, and two builds. - Set the Fix version to the release this specification ships in.
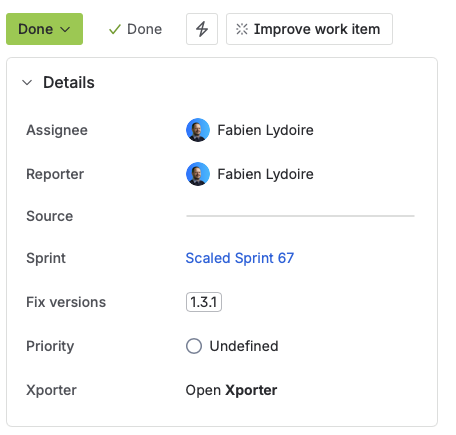
The details panel on a specification, with Fix versions set to 1.3.1 alongside the sprint and priority. - Set Obsoleted in when a later version supersedes this specification. Fix version and Obsoleted in together are what produce the change log for each release.
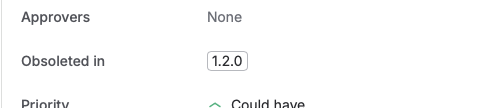
The Obsoleted in field on the details panel, set to 1.2.0. - When the implementation is finished, move it to Development review with the Assignee set to the reviewer, who usually reviews it through the pull request.
- If you get stuck, move it to Blocked or Clarification required so the rest of the team can see it.
- The reviewer then moves it on to testing, or sends it back to In development for more work.
Test a specification
- Once development review approves the implementation, the specification moves to Ready for QA and testing can start.
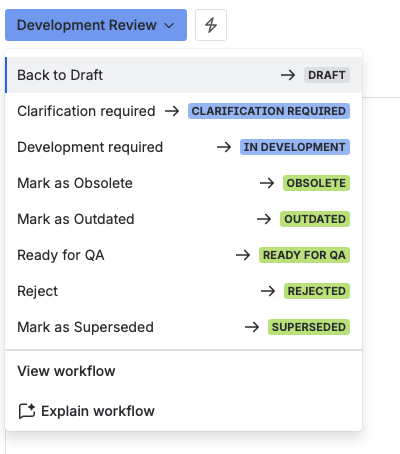
The status menu opened from Development review, offering Ready for QA to hand off to testing, Development required to send it back, Back to Draft, Clarification required, and the four terminal transitions. - The test team verifies the implementation against the specification through a test and its test execution. See Manage tests for how the test itself is written and run.
- If the test passes, choose Approve to move the specification to Done.
- If the test fails, send it back with Back to Draft when both the implementation and the specification are wrong, Mark as Outdated when the specification no longer reflects what is needed, or Mark as Superseded when a newer specification already exists.
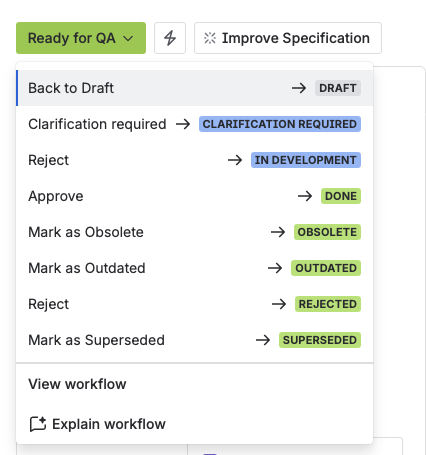
The status menu opened from Ready for QA, offering Approve to Done, Back to Draft, two separate Reject options (one back to In development, one to the terminal Rejected status), and the Outdated, Obsolete, and Superseded transitions.
Done is locked. Once a specification passes QA, it cannot be edited. Up to that point, a specification in development stays re-openable, however far along it is.
Retire or replace a specification
- Move a specification to Outdated when its content is wrong and needs revision. This is also how you make an approved specification editable again, so assign it to whoever will update it, then put it back into review once it is fixed.
- Move a specification to Obsolete when it is no longer used.
- To replace one, open its ... menu and choose Clone.
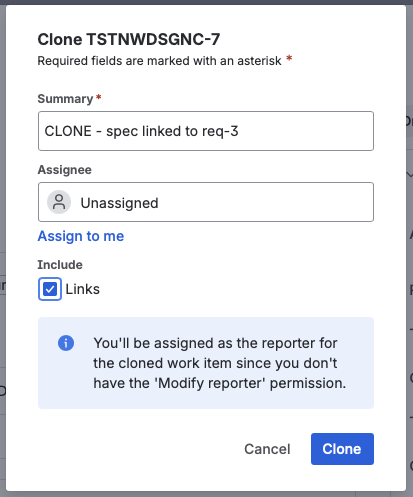
The Clone dialog, with the Summary still prefixed CLONE and Include: Links checked so the new specification keeps the same traceability. - Keep Include: Links checked, remove the
CLONE -prefix from the Summary, then click Clone. - Move the old specification to Superseded.
Export specifications to a controlled document
- In Confluence, create a new document in the Draft Documents space from the Specification template. See Create a document or template for the wizard itself.
- On the Specifications macro, set Products and, if you need to narrow it further, Type or Category (leave a filter empty to import everything that matches the rest), choose the Fields to include, then click Save.
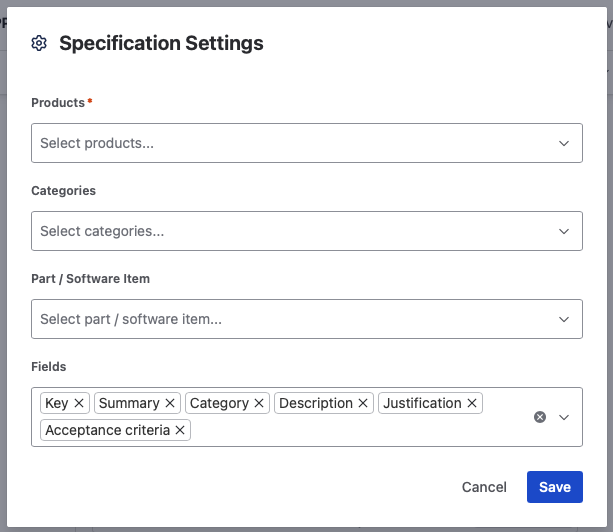
The Specification Settings dialog, with Products, Categories, and Part / Software Item filters above the list of Fields to include. - If the page has no Specifications macro yet, type
/specificationsto insert one.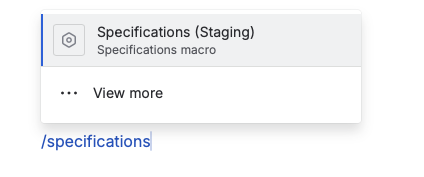
The slash command menu after typing /specifications, offering to insert the Specifications macro. - To change what was imported, click the macro in edit mode and reopen its settings.
Once the content is in, the document goes through the same approval as any other controlled document. See Document Control overview.